uncomplicated.
Posted: March 24, 2010 Filed under: pancetta, peas, rice, squash 1 Comment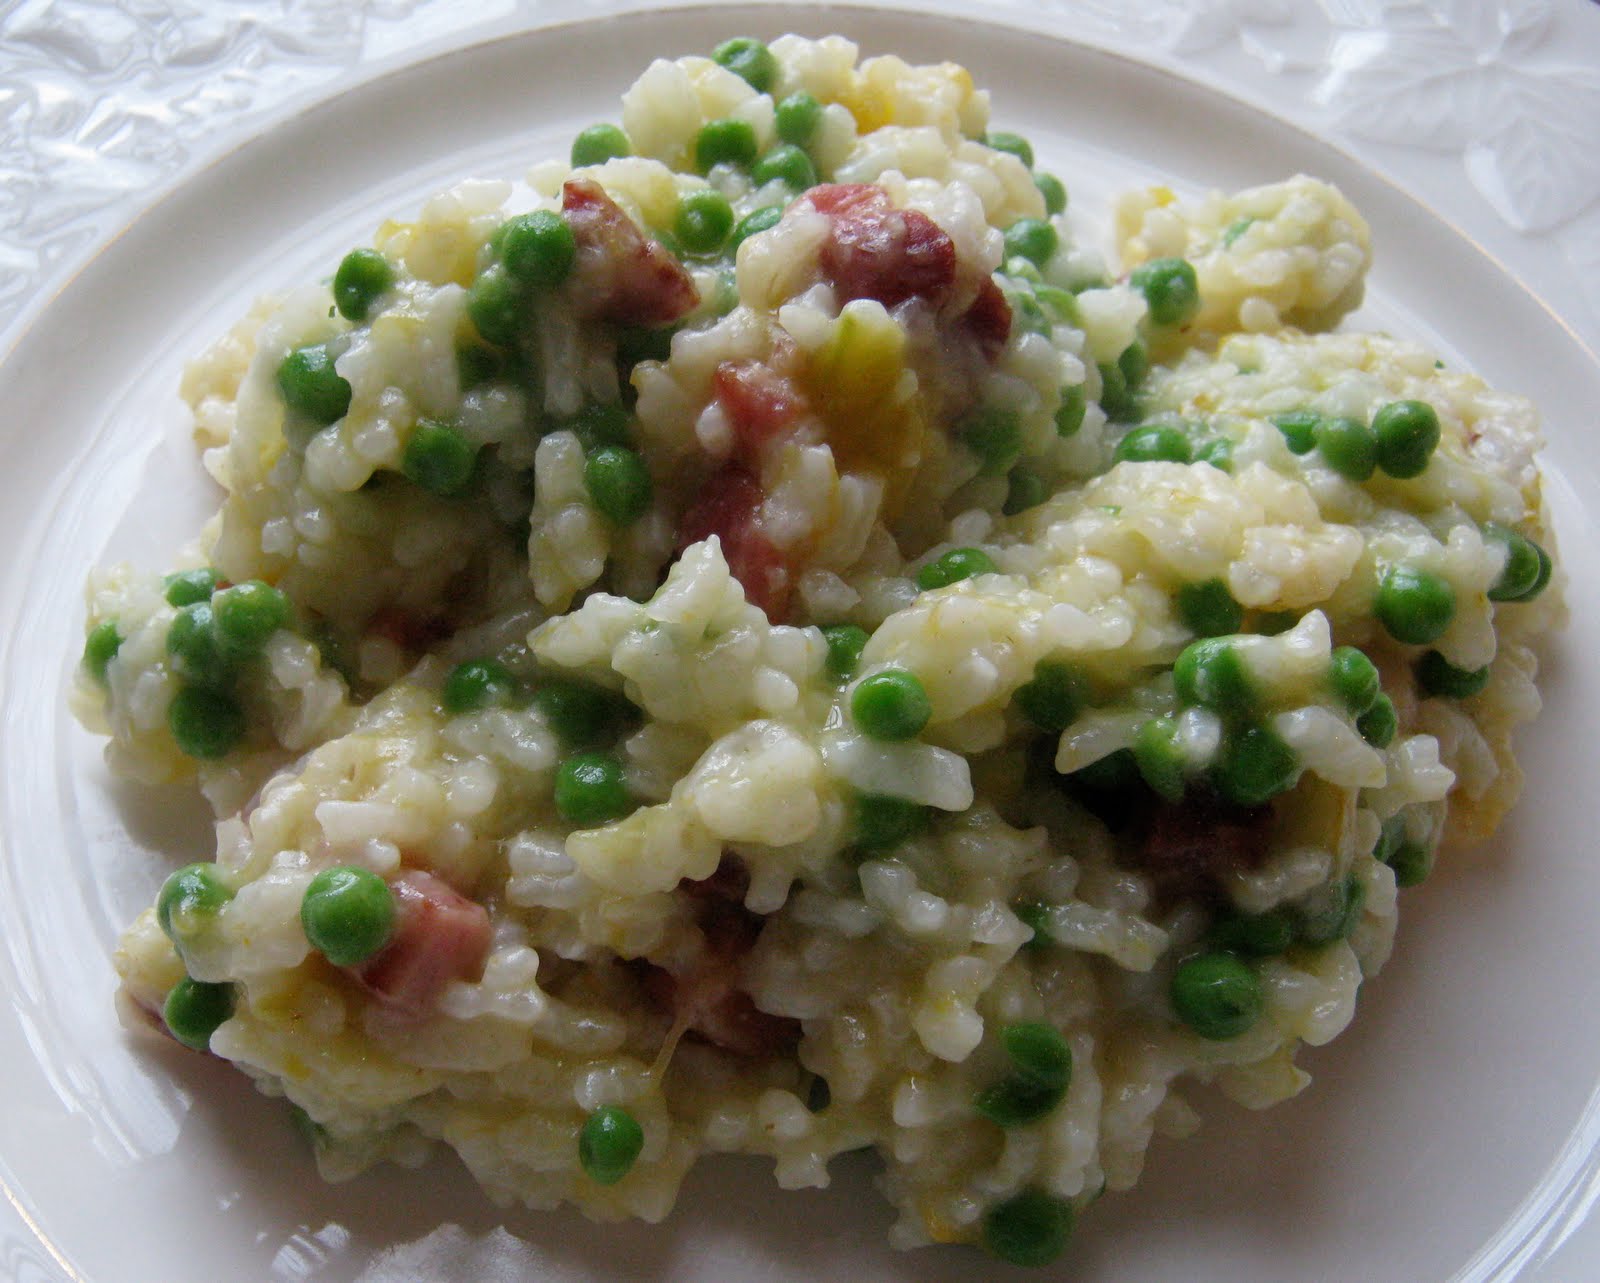 I used to love making risotto.
Not only did it encompass everything that makes me happy in a food (butter, wine, starch, meat, cheese); making it was a process that I found thoroughly enjoyable, especially if I had friends around. The risotto dinner routine from those days goes something like this:
Heat broth. Pour a glass of wine for everyone. Start the butter, the onion, the rice. Start talking. Splash some wine into the pan. Splash some wine into the glasses. Ladle broth into the rice, and start stirring. More wine, more gossip, more broth, more stirring.
Eventually everyone sits down, flushed from the steam and the stirring and the wine. The conversation doesn’t really slow down, because another advantage of risotto is that it is completely uncomplicated to eat.
These days, while I still love the uncomplicatedness of eating risotto, still love the wine and the conversation, the risotto dinner routine has had to evolve somewhat.
It may seem hard to imagine, but I have discovered (necessity being the mother of invention) that a really creamy, delectable and soul-satisfying risotto can still be had without my standing over the stove for half an hour and coaxing it into being.
Friends, I have given up the stirring.
And it has changed my life.
Risotto for a New Reality
By some miracle, my daughter, who has an aversion to vegetables and doesn’t like her food to be mixed together, devours this dish. I also buy my squash already diced, and my pancetta already cubed, which adds considerably to the ease of making it on a weeknight (well, any night really) and thus also to its soul-satisfying cred.
2c arborio rice
1/4c olive oil
2c (450g) diced butternut squash
1/4c white wine (optional – if not using, increase broth to 5 1/2c)
5 1/4c chicken broth
150g diced pancetta
2c frozen peas
1/2c grated parmesan
Preheat oven to 425 degrees.
In a deep, heavy-bottomed skillet with a tight-fitting lid, combine rice, oil, squash wine, and 5 cups broth over medium-high heat. Stir once, bring to a boil, then clamp the lid on and transfer to the oven. Cook 25-35 minutes (I find it takes a little longer if you’re using frozen squash), until rice is al dente and broth is mostly absorbed.
While rice is in the oven, cook pancetta cubes in a small heavy skillet until crispy. Drain on paper towel and set aside.
Return rice to stovetop over medium heat. Stir rice well, scraping up any crispy bits that may be stuck to the bottom of the pan; stir in pancetta, peas, and remaining 1/4 cup broth. Cook until peas are just tender, maybe 2-3 minutes. Beat in grated parmesan.
Serve immediately, with a generous grating of black pepper.
Serves 6.
crumbs.
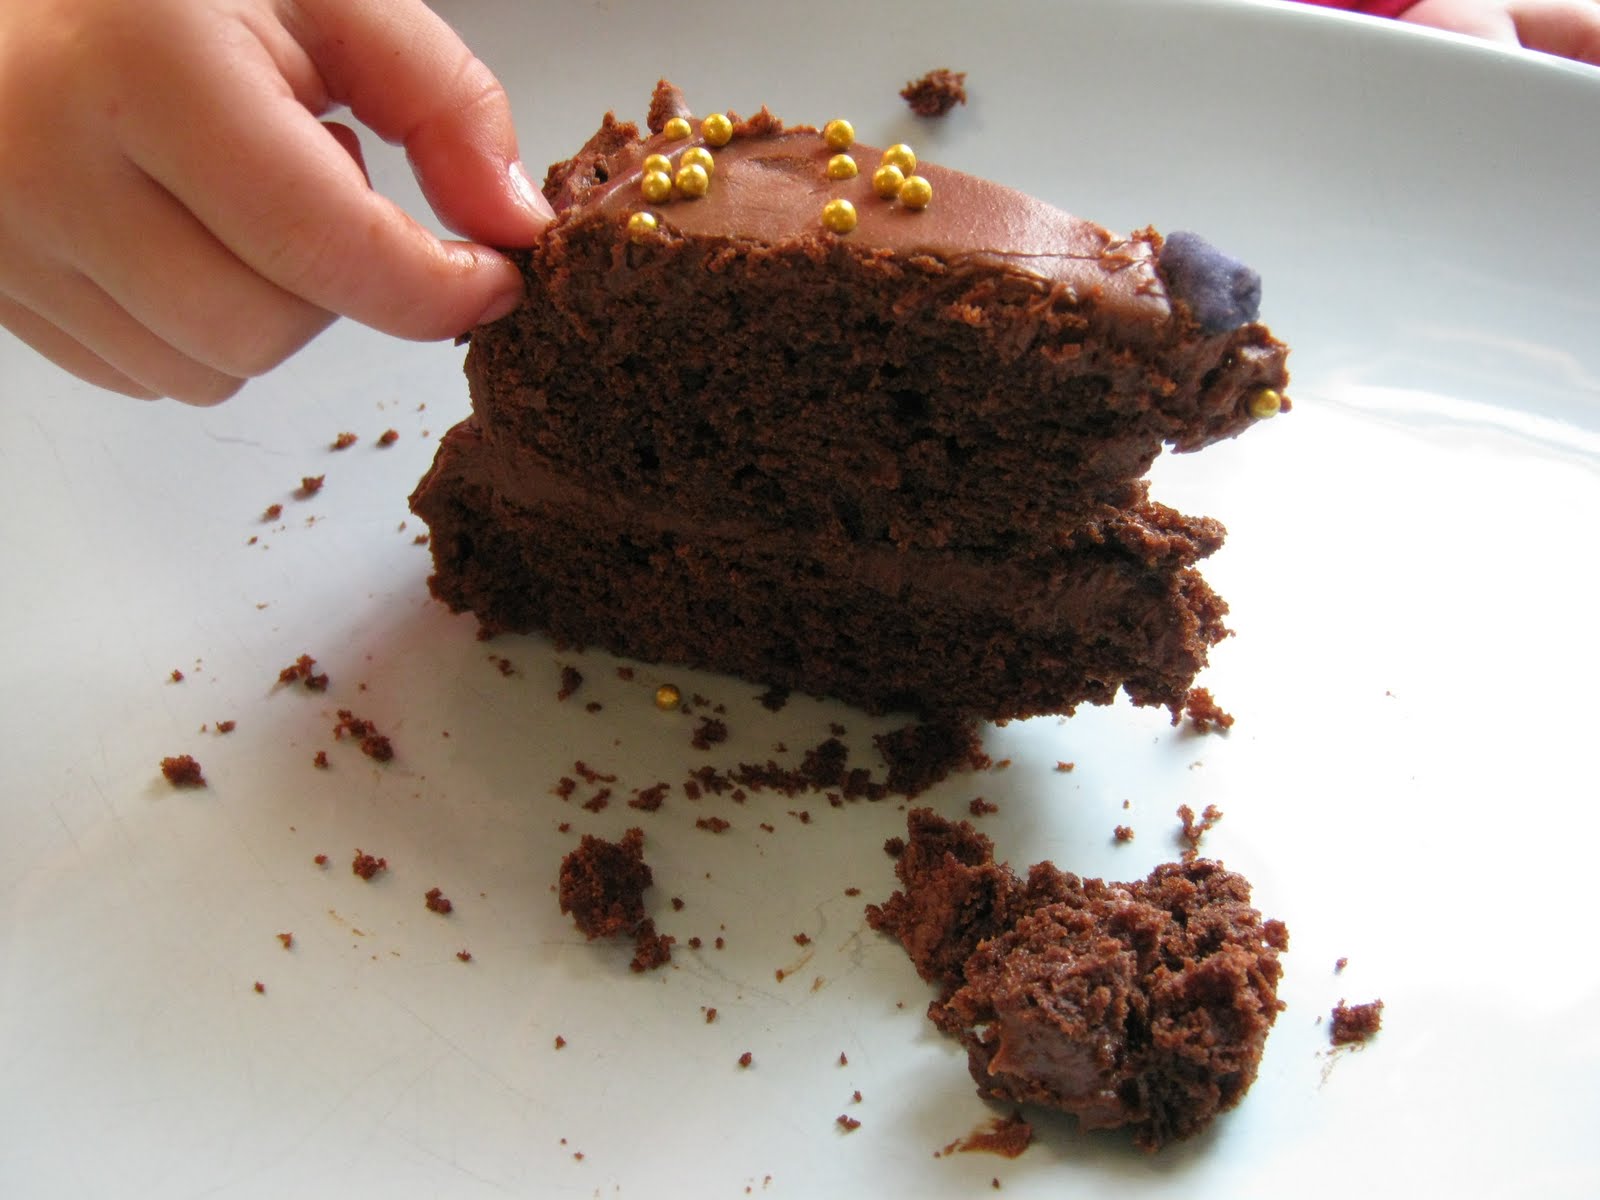
Posted: March 15, 2010 Filed under: cake, chocolate 1 Comment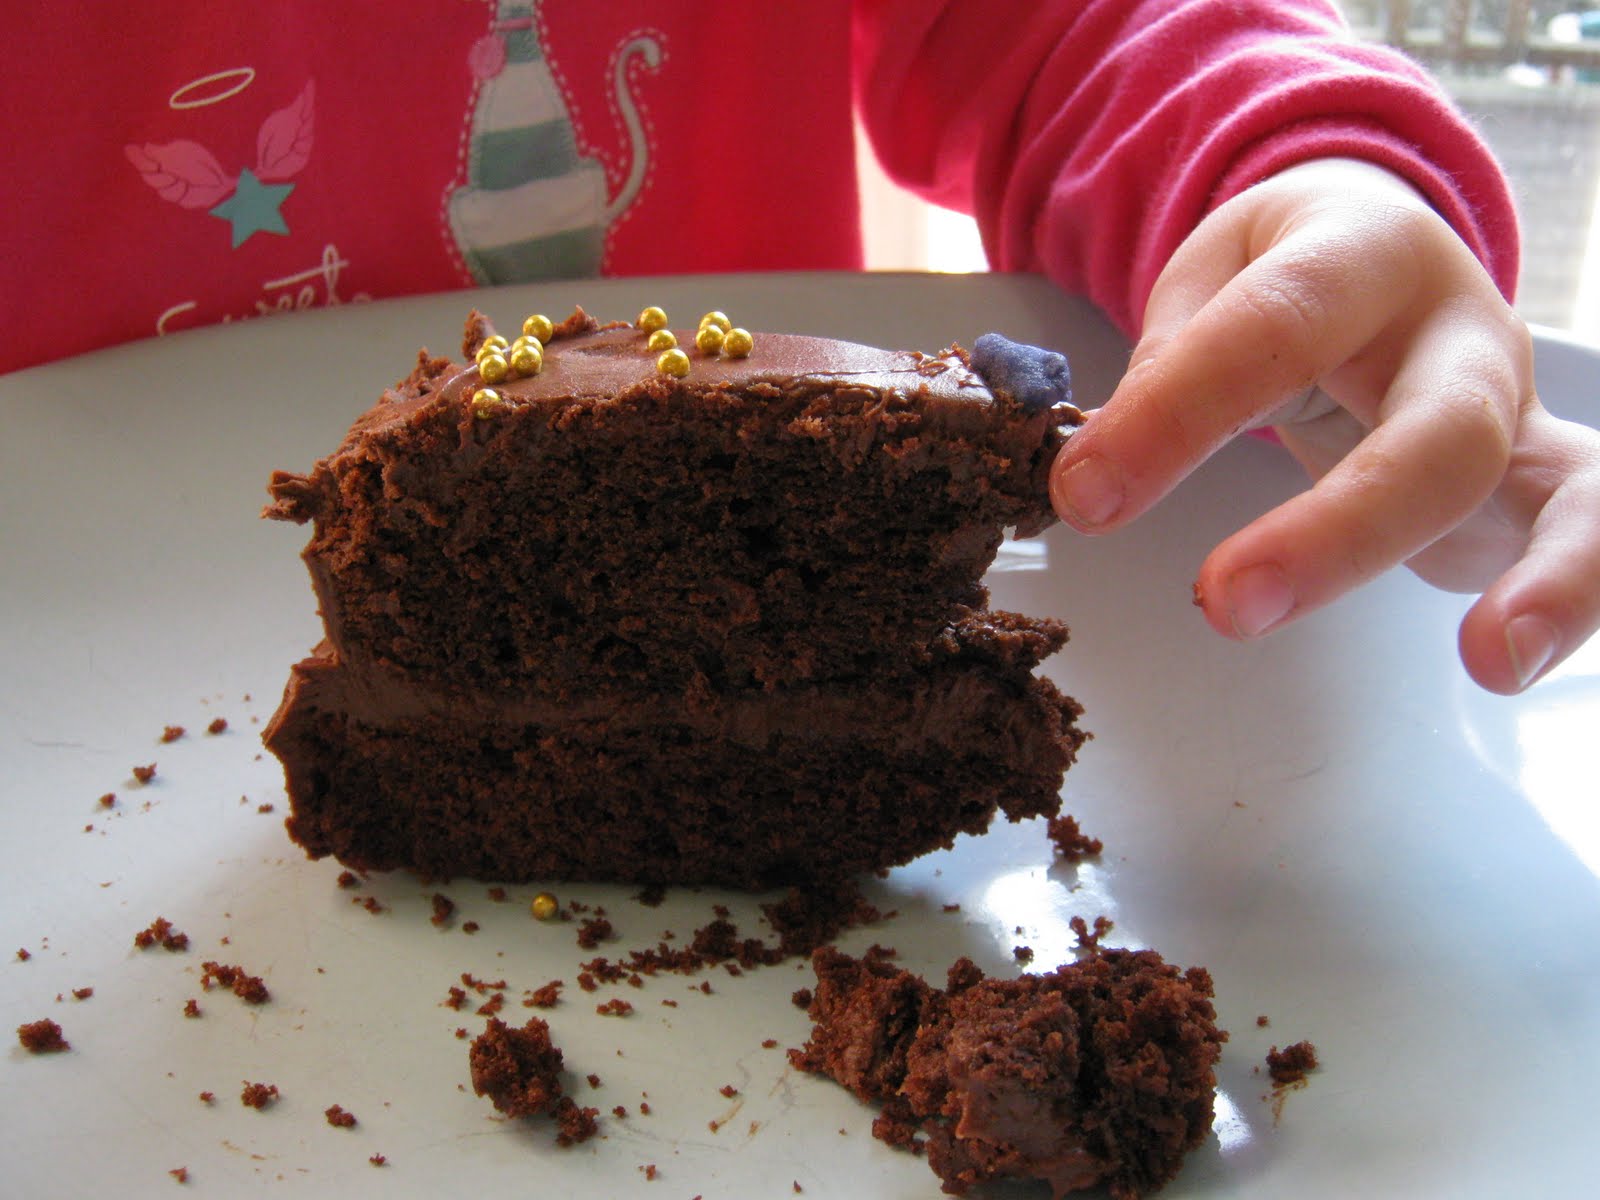 These are not the photos I had intended for this post.
I had actually been hoping for something more like this, but without the glare – because in real life, this cake is a splendid looking creation:

Still, March so far has been such a month of highs and lows, cheers one moment and tears the next, that it seemed more reasonable to let everyone get their hands into the photo (and into the cake) than not.
I made it twice this week – yes, it’s that good! And it’s that easy! – and would have gone for a third, even if just for the photo op, but the rest of my life has been encroaching on my time in the kitchen lately.
I should have reason to make one more celebratory cake in the very near future, though, and when I do, this will be the one.
Easy Does It Chocolate Cake
Adapted from Nigella Lawson
The ingredients in the original recipe for this are measured by weight, which I recognize is not easy for everyone, so I’ve included approximate traditional measurements as well for everything but the icing sugar, which I find easier to eyeball anyway. In an ideal world, all of the ingredients would be at room temperature before you started, but please don’t let that be the deal-breaker.
The Cake:
200g (1 1/2c) all purpose flour
200g (1c plus 2 tbsp) sugar
40g (1/2c) cocoa powder
1 tsp baking powder
1/2 tsp baking soda
175g (3/4c) unsalted butter
2 eggs
1 tbsp vanilla extract
2/3c sour cream
The Icing:
75g (1/4c plus1-2 tbsp) unsalted butter
175g (6 oz.) best-quality dark chocolate
300g icing sugar
1 tbsp liquid honey
1/2c sour cream
1 tsp vanilla extract
Preheat oven to 350 degrees. Lightly grease two 8-inch round cake pans and line their bottoms with parchment.
Place all of the cake ingredients in the food processor (seriously!) and process until a smooth, thick batter is formed. Divide the batter evenly between the two prepared pans and bake in the middle of the oven about 25 minutes, or until a cake tester inserted in the centre comes out clean. Cool cakes 10 minutes in their pans and then invert onto a rack to cook completely.
When cakes have cooled, make the icing:
Combine butter and chocolate in a large bowl and set over a pan of barely simmering water, stirring occasionally, until chocolate is melted and mixture is smooth. Set aside to cool slightly.
Place the icing sugar (I usually eyeball, just over half of a 500g bag to start with the intention of adding more if needed) in the bowl of the food processor and pulse a few times to get rid of any lumps.
Add honey, sour cream, and vanilla to cooled chocolate mixture and beat with a spatula until smooth.
With processor running, add chocolate mixture to icing sugar. Icing should be glossy and spreadable, but thick enough that it will not drip off the cake. If you find you need more icing sugar, add it by tablespoonsful until desired consistency is reached.
Place one cooled cake on a cake plate, up (rounded) side down. Spread about a third of the icing onto the bottom cake, then top with second cake, this one right side up. Spread remaining icing over the top and sides of the cake.
Decorate however you see fit, or not at all.
change.
Posted: March 8, 2010 Filed under: garlic, green beans, pork, thai 2 Comments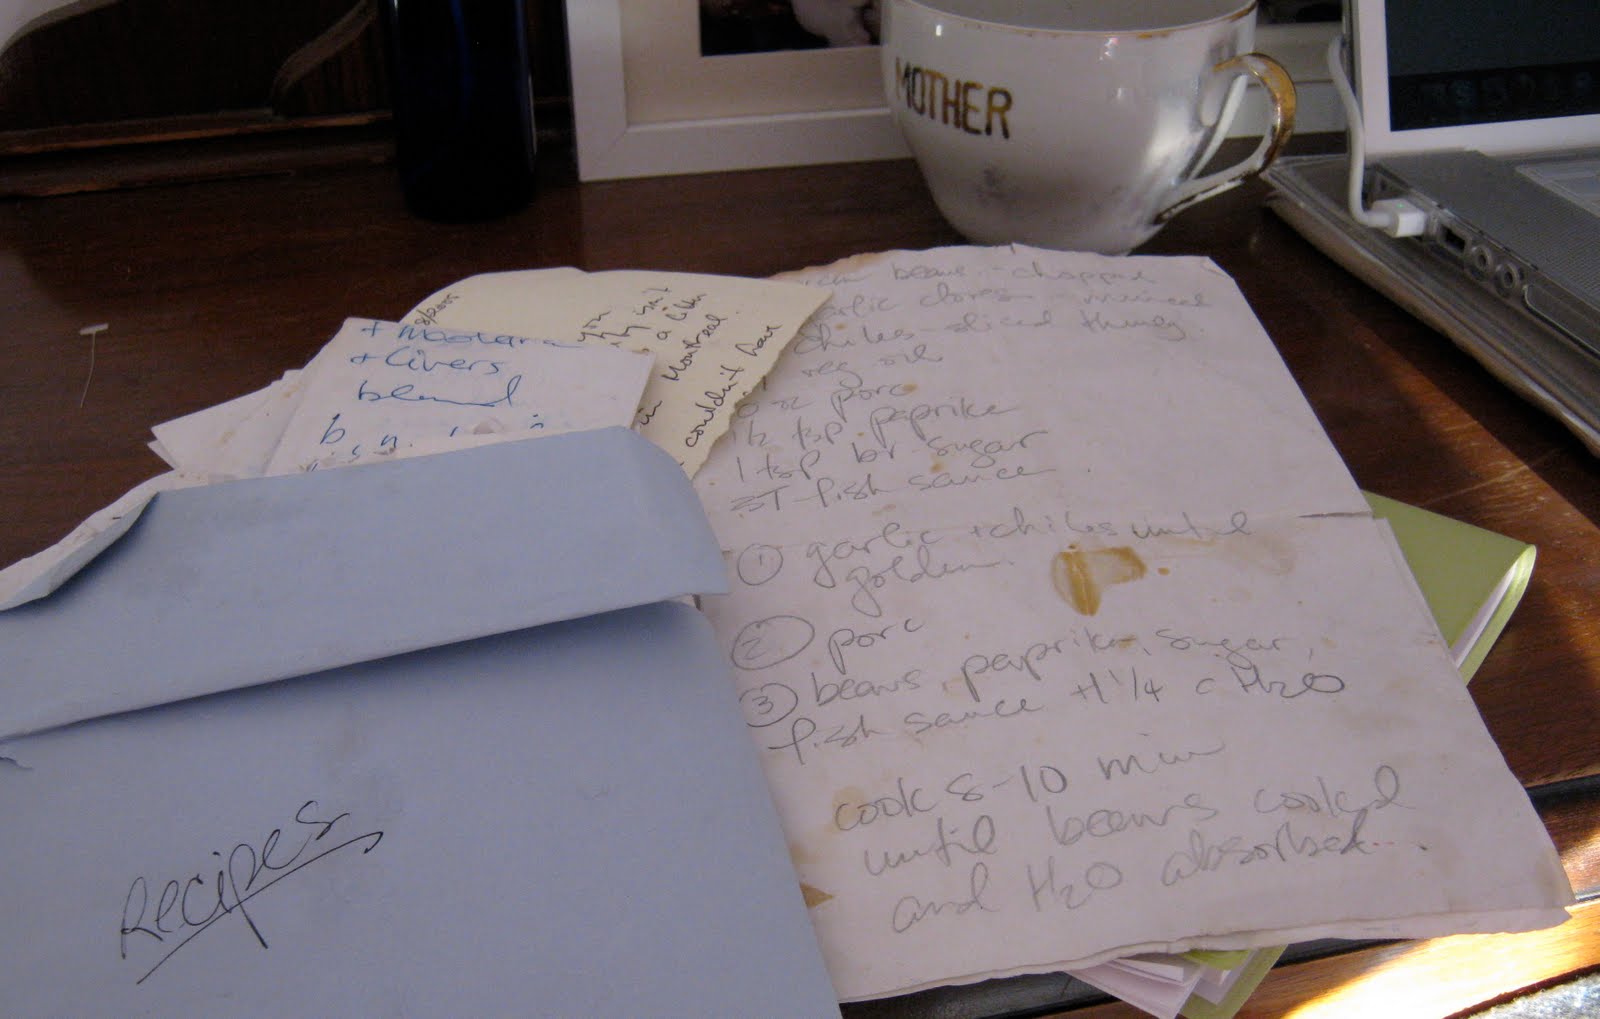 I was doing a bit of optimistic almost-spring cleaning the other day when I came across this envelope, crammed full of hand-written recipes on bits and pieces of paper in various states of disrepair.
It was like finding buried treasure or reading a diary, all of these food-related memories linking me instantly to the moments when they were created; and, as is so often the case with this kind of thing, reading them left me in a bittersweet mood, nostalgic for some aspects of my old life, and fiercely grateful for who I am and where I am now.
I am not the only one in my circle of friends who has a move planned in the not-too-distant future, so I know I am not alone in my looking backwards with mixed emotions while contemplating a leap forward into the unknown.
We’re all trepidatious, optimistic, and sad. We all want to embrace what’s coming wholeheartedly, but are reluctant to leave behind the joy of the here and now.
We’ve all done it before, and we will all do it again.
 The good news is that with every move, with every shift, comes the chance to lighten our load a little, and to distill the current chapter of our lives down to its essence before starting anew.
This recipe is one of the treasures that I carry with me move after move.
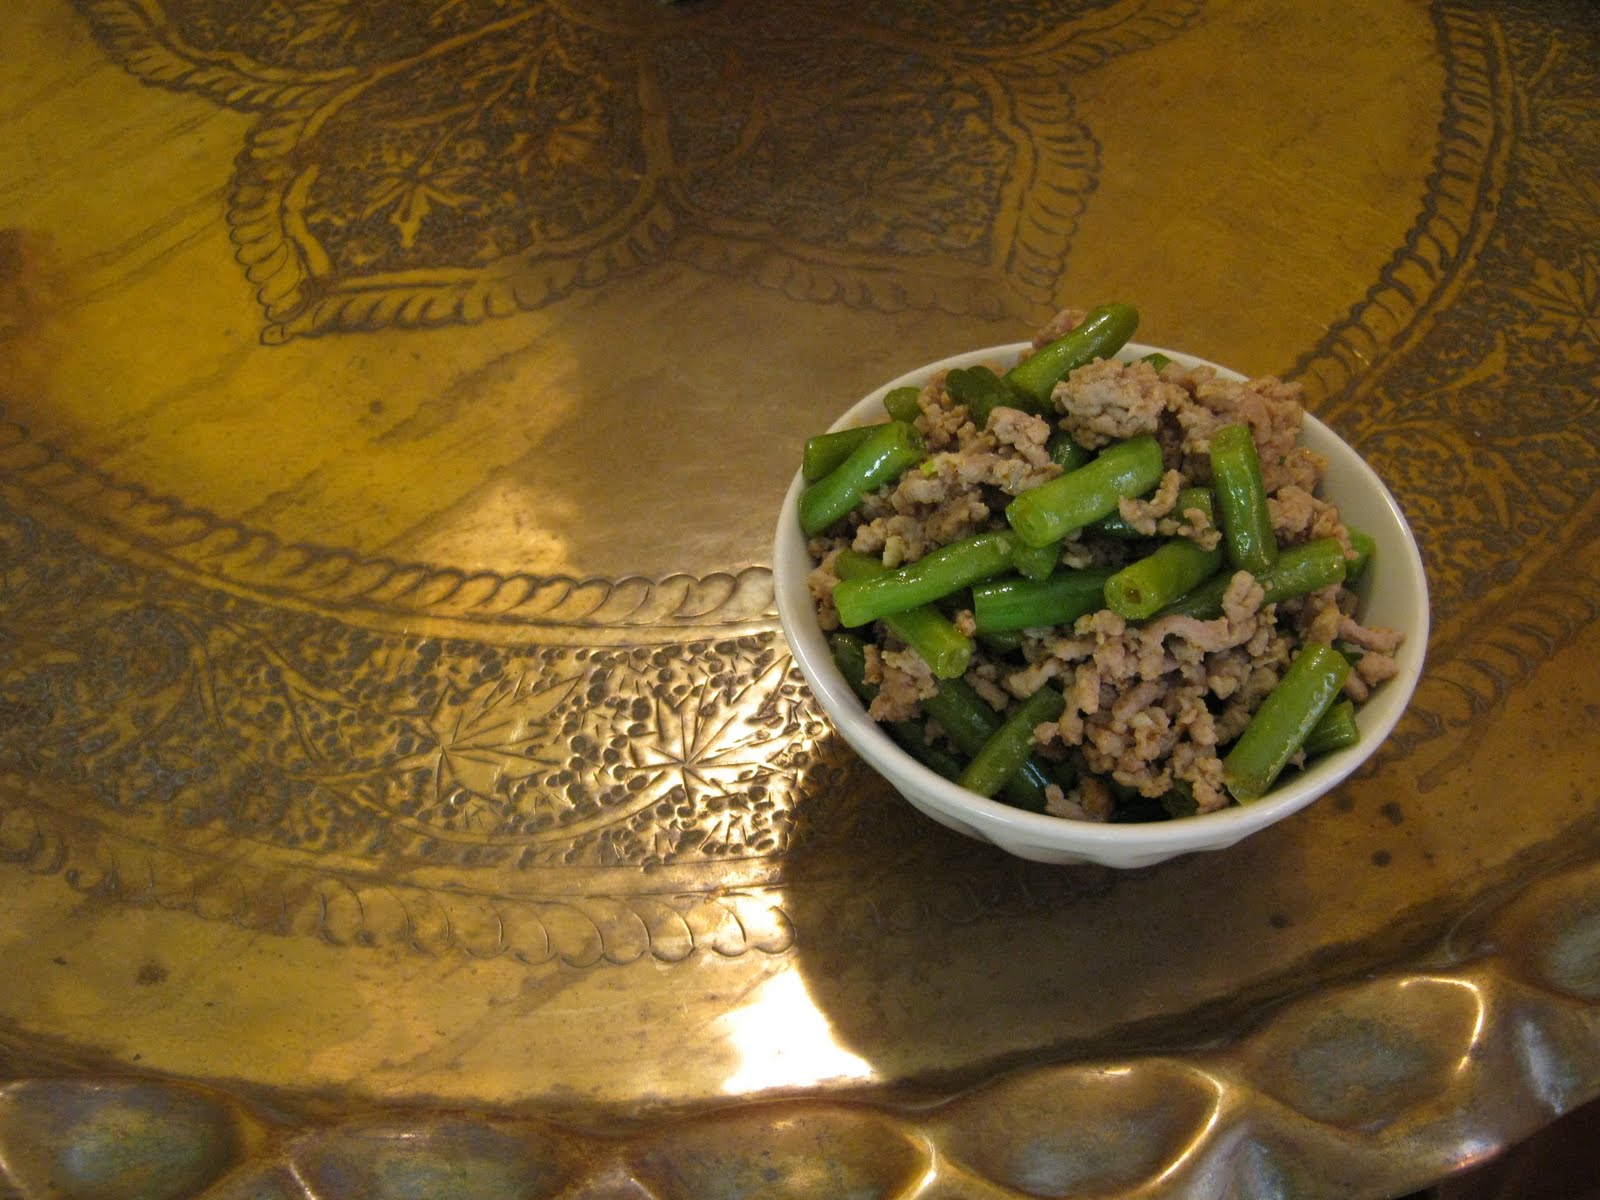
It was a go-to dinner during a phase in my life when several dear friends and I were utterly heartbroken yet managed to eat incredibly well. It isn’t much to look at, but it’s the kind of dish that you have to serve and get out of the way so as not to be trampled by people scrapping for seconds; and, although I am not a savoury breakfast person, I have been known on a certain kind of morning to eat this by the spoonful, straight from the pan.
“Pork and Beans”
adapted from Nathalie Senecal
5 tbsp vegetable oil
10 cloves garlic, minced
500 g lean ground pork
1 tsp Thai green curry paste, or to taste
350 g green beans, chopped
1/2 tsp paprika
1 tsp brown sugar
3 tbsp fish sauce
1c water or coconut milk
Heat oil in a large, deep skillet over medium-high heat. Add garlic and cook, stirring, until golden.
Add pork and curry paste and cook, stirring, until pork is no longer pink.
Add beans, paprika, sugar, fish sauce and water or coconut milk. Reduce heat to medium-low and cook until beans are cooked and much of water is absorbed, 8-10 minutes or so.
Serve with steamed jasmine rice.
hello, babycakes!
Posted: March 5, 2010 Filed under: baking, bananas, chocolate 4 Comments
My family recently decided to dip a toe into the icy waters of gluten-free eating.
I know you don’t know me that well yet, but you may have already guessed at my level of enthusiasm for such an endeavor – I mean really, I’ve only just begun to welcome dairy back into my daily life, and now we’re giving up wheat? Need I remind you that wheat, not unlike butter, factors prominently in practically everything that is delicious in my diet?
Thankfully I am not the beer drinker in my family, so all is not lost.
Still, I do adore baking (as a noun as well as a verb) and I have not had very many experiences with gluten-free baked goods that I would describe as palatable, let alone tasty.
At least I hadn’t before yesterday.
The above is a photo of my first ever attempt at gluten-free baking, and it was nothing short of spectacular. Honestly. Not heavy and crumbly, not dry, not a tiny little sorry excuse for a loaf, but a lovely, treaty, moist, tasty banana bread. I am paying the highest possible compliment when I say that it didn’t taste healthy at all.
The recipe came from the BabyCakes cookbook. The book’s author, Erin McKenna, is a little militant in her insistence that you follow her directions to the letter, which was a bit of a challenge for me as I have a pathological need to fiddle with recipes. So I did fiddle with this one, but barely at all.
And I’m lucky I got that photo when I did, because minutes later the plate was empty.
I wouldn’t call our foray into the world of the gluten-free a full-on conversion just yet, but if we ever do turn our backs on wheat entirely, baking like this will definitely ease the withdrawl pangs.
Banana Chocolate Chip Bread
adapted from BabyCakes
Where we live, it is cool enough that my coconut oil was solid in its container, so I warmed it in a saucepan set over low heat before using. Also, Erin McKenna insists that ALL ingredients must be measured using dry ingredient measuring cups (not the glass ones with the spouts), so that’s what I did.
2 c Bob’s Red Mill Gluten Free All-Purpose Baking Flour
2 tsp baking powder
2 tsp baking soda
1 tsp xanthan gum
1 tsp salt (optional – I didn’t use any)
1 tsp ground cinnamon
1/2 c coconut oil, plus more for the pan
2/3 c agave nectar
2/3 c milk (Babycakes calls for rice milk, but I used regular old skim milk, because that’s what I had)
1 tsp vanilla
3 mashed organic bananas (about 1 1/2 cups)
1 c chocolate chips
Preheat oven to 325 degrees.
Using coconut oil, lightly grease a loaf pan – mine is an old Pyrex one, measuring 8.5″ X 5.5″ X 2.5″.
In a medium bowl, whisk together flour, baking powder, baking soda, xantham gum, salt (if using) and cinnamon.
In a large glass measuring cup or jug, whisk together coconut oil, agave nectar, milk, and vanilla. Add to dry ingredients and stir until batter is smooth. Gently fold in bananas and chocolate chips until they are evenly distributed throughout the batter.
Pour batter into prepared pan and bake in the centre of the oven for 55-60 minutes, turning pan 180 degrees halfway through cooking time. If the top of the loaf begins to darken before the middle is cooked (as happened to me), cover loosely with foil for the remainder of the cooking time.
Bread is cooked when a tester inserted into the centre comes out mostly clean.
Cool 20 minutes in pan, then run a knife around the edge of the bread and gently invert onto a cutting board. Lift the pan away, and then re-invert the bread onto another board. Cool completely before storing, or cut and serve warm.
a hot, buttery bath.
Posted: March 1, 2010 Filed under: broccoli, butter Leave a comment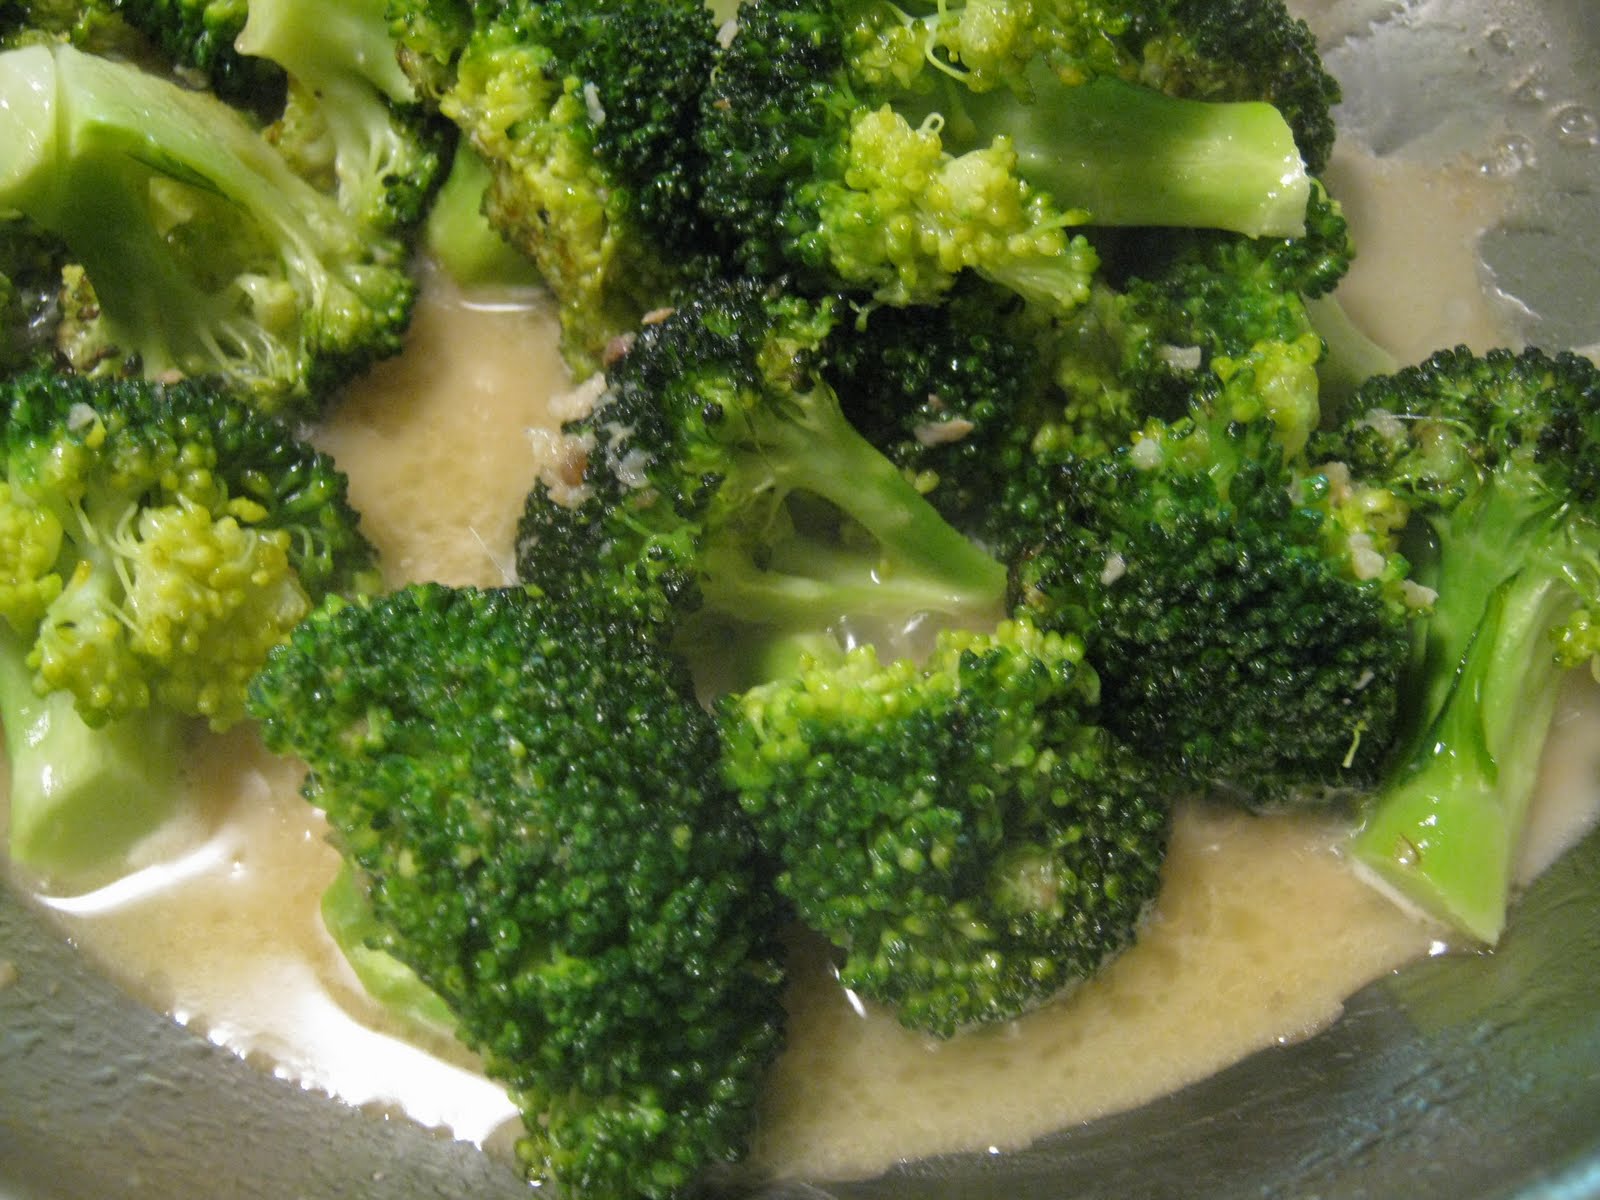 I went to a friend’s house this past weekend to enjoy a rare afternoon’s gossip and glass (or two) of wine, unfettered by the requirements of my family (who were, all three of them, safely ensconced at our house just across the street). I had a marvelous time, greedily making my way through several truffled olives and more than my share of a luscious cheese fondue; and when I got home, I made a thrilling discovery:
Dairy does not seem to be the problem it once was for my nursing baby.
I was, besides being thrilled, also a little relieved – had things gone the other direction, and my reckless cheese-eating resulted in hours of pain (for the baby) and misery (for the rest of us), I’d be too busy feeling like a terrible mother to blithely blog about it.
But as I was also very, very grateful for the opportunity to start eating butter again, I cooked this simple dish almost immediately. The broccoli component is enough to make you (well, me anyway) feel okay about the rest of the ingredients; eaten with brown rice, it could almost be considered virtuous.
Broccoli Bagna Cauda
2 small heads organic broccoli, separated into florets
4 tbsp olive oil, divided
salt and pepper
1/4 c unsalted butter
2 cloves garlic, minced
2 anchovy fillets, minced
a large splash of white wine
a generous squeeze of lemon juice
1/3 c toasted pine nuts
scant 1/4 c freshly grated parmesan
Preheat oven to 425 degrees.
Toss broccoli florets with 2 tbsp olive oil and the salt and pepper, and place on a parchment-lined baking sheet. Roast about 20 minutes, until broccoli is quite tender and beginning to brown.
In a large skillet, melt remaining 2 tbsp olive oil and butter over medium heat. Add garlic and anchovies and saute until garlic is colouring slightly, about 2-3 minutes; add wine and lemon juice and simmer a few minutes.
Transfer broccoli to the skillet and cook a few more minutes, tossing the broccoli and letting the sauce reduce a little. Add pine nuts.
Sprinkle parmesan over top and serve.
Serves 2 as a main course (with rice), or 4 as a side dish.
let’s talk about expectations.
Posted: February 25, 2010 Filed under: barley, soup, vegetarian Leave a comment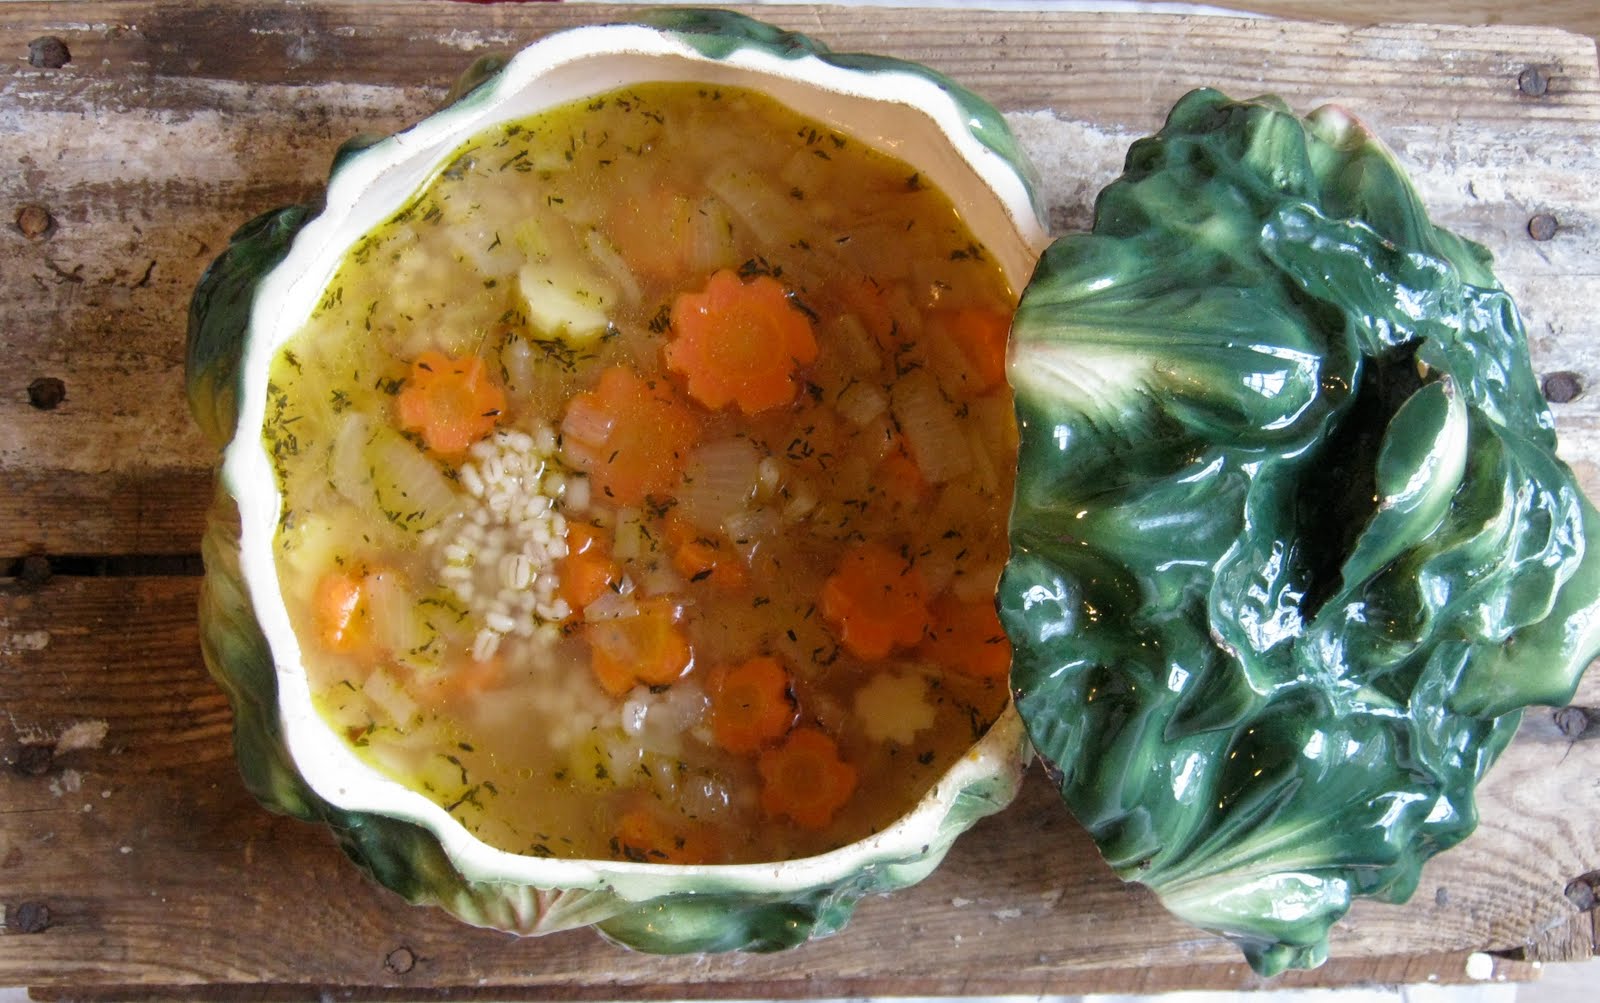
The lovely and romantic dinner I had envisioned for Valentine’s Day didn’t quite come together as planned: I bought all the makings for boeuf bourgignon, and in my fantasy it was going to bubble away contentedly on the stove, filling the house with good smells, while my beloved and I sat in front of the fire and ate cheese, drank wine, and – I don’t know, talked?
Of course that’s not what happened (I’m not sure how I managed to overlook our children when I concocted that fantasy). We did have a lovely day, replete with chocolate (and chocolate-y) kisses, as wonderful and romantic as a Sunday in February with two tiny children can be; but by about three o’clock that afternoon, I realized that the boeuf bourgignon was never going to happen.
And I’m a little embarrassed to admit this, but I was quite disappointed for a moment. I felt (however briefly) that I had failed to live up to the day’s expectations of me – or my expectations of the day. All of that joyful family time diminished slightly because I felt that things weren’t happening as I had hoped.
Still, I rallied: we opened the good wine that I had bought to cook with, and I made a simple soup with the highest-quality beef broth that was also intended for the bourgignon. We ate our cheese and baguette with the soup, and the bubbly remains in the fridge, awaiting its opportunity.
Why, you may wonder, have I chosen today to tell you about a meal that happened nearly two weeks ago?
Well, I made that soup again last night and it was delicious. Everyone in our house is under the weather this week, so I put it together in a bit of a rush, not expecting much – but it was a perfect simple soup, hot enough for comfort on a cold night and hearty enough that no one was left feeling hard-done-by (which can happen with a soup supper around here).
I’m guessing I’m not the only one who could benefit from lowering her expectations this weekend. These are the dying days of February; the Olympics are drawing to a close. Spring’s celebrations still feel significantly far off. In our part of the world, it’s snowing more than it has all winter.
Best to huddle in and not plan too much. Keep expectation to a minimum, and the joy to be found in simple things may take you by surprise.
Simple Barley Soup
The first time I made this, I used a wonderful and expensive organic beef broth. Last night, I used chicken stock, which is all I had on hand, and not one of us (including the soup) was the worse for it. I also realized after I took the above photo that I had forgotten to add the mushrooms, and that the sprigs of fresh thyme I had intended for a garnish were still in the fridge. Ah well. Life, as they say, is not lived in a lab.
1/2 c pearl barley
1 1/2 c water
1/4 c olive oil
2 medium onions, chopped
2 large or 3 medium carrots, chopped (yes, those are carrot flowers you see in the photo, but really, just chop them to a uniform size)
2 large or 3 medium parsnips, chopped (see above)
a handful of sliced mushrooms
1/4 c white wine
1 tsp dried thyme
5 c broth (dealer’s choice)
2 cloves garlic, minced
Place barley and water in a medium saucepan over high heat. Stir well, bring to a boil, cover and simmer until most of water is absorbed and barley is quite tender, 30-45 minutes. Remove from heat and set aside.
Meanwhile, in a large saucepan, heat olive oil over medium high heat. Add onions and cook until golden, stirring frequently so they don’t burn. Add carrots, parsnips, and mushrooms, and cook, stirring, until onions are deep golden in colour, about another 5 minutes. Add wine, stirring and scraping up any brown bit stuck to the bottom of the pot. Add thyme and broth. Bring to a simmer, then cover and lower heat. Cook until vegetables are just tender, 10 minutes or so, then add cooked barley and garlic. Cover and continue to simmer until vegetables and barley are tender, 20-30 minutes.
Serves 4-6 as a main course, with bread and a salad.
are you talking to me?
Posted: February 23, 2010 Filed under: muffins, pumpkin Leave a comment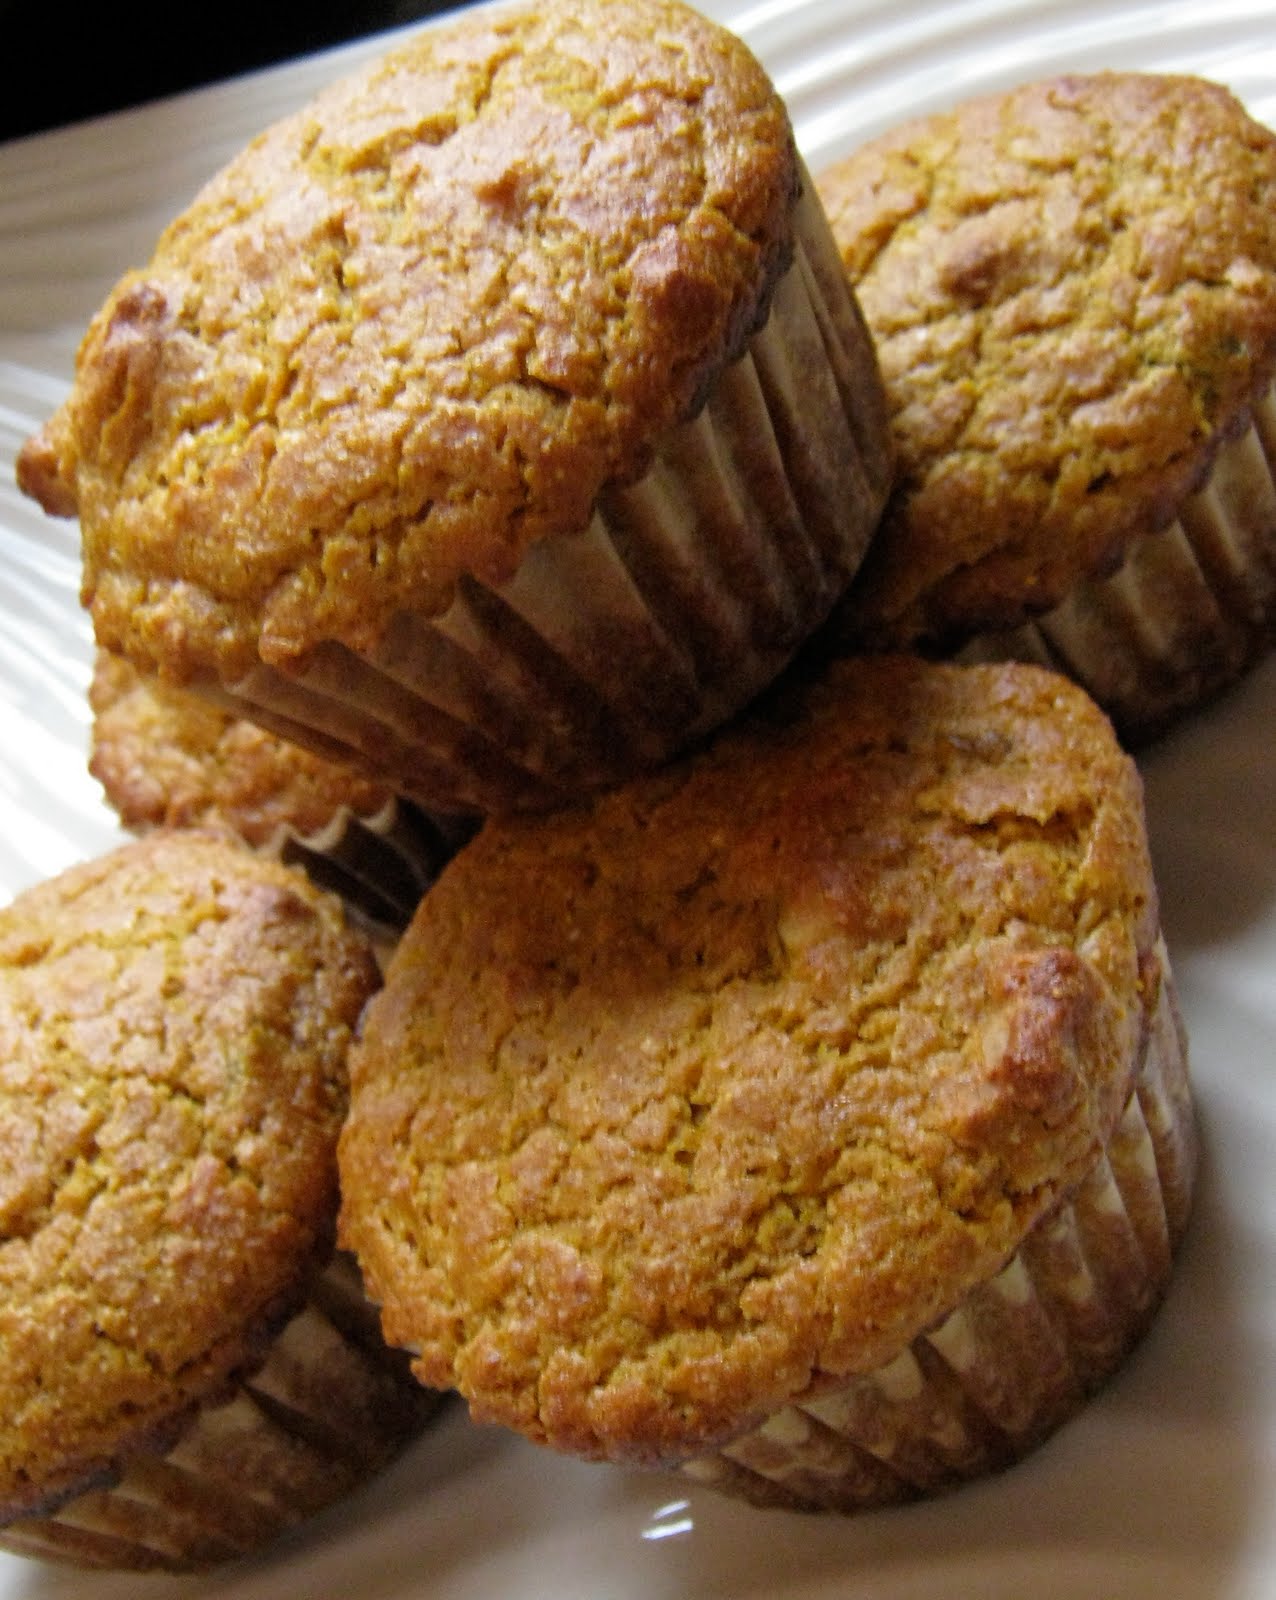
I recently read a blog post in which the author, also a mother of young children, had had a cold. In her post, she talked about how she’d listened to her body so she’d know how to help herself recuperate; and then she described her lunch, which consisted of something along the lines of steamed beet greens, tempeh and sesame seeds with a bowl of sliced oranges and a glass of soy milk on the side.
Well.
I marvel that there are bodies out there telling their people to eat like that. My own body, on a day last week when I’d been laid low by a virus myself, demanded a bacon, avocado and goat cheese sandwich on a croissant for lunch. Granted, it was a whole wheat croissant, but still, a far cry from the self-healing fare described above.
It’s comforting to think that I’m not the only one whose body speaks to her from a slightly less lofty place: my running coach, who is also a mother and leads such a busily giving life that it puts mine to shame, called me last week on the morning we were set to go out together and said, “I’d like to tell you that I’m sick and can’t run, but the truth is that I have a raging hangover.” Wisely, she stayed in bed that morning.
After hanging up the phone, did I consider the needs of my own overfed body and head out for a run on my own?
No, dear reader, I did not. I stayed home and made muffins and ate more than I should have while flipping through the latest Bon Appetit.
Pumpkin Spice Muffins
The soaking method for the raisins here comes from what I consider the best banana bread recipe ever; if rum seems too much, feel free to use water! Also note the lack of sugar in this recipe – I prefer to use apple juice concentrate, but brown sugar may be substituted.
1/3 c golden raisins
1/4 c rum
2c whole wheat pastry flour
2 tsp baking powder
1/4 tsp baking soda
1 tsp cinnamon
1 tsp ground cardamom
1/4 tsp ground cloves
1 scant tsp ground ginger
1/2 c grapeseed oil
3/4 frozen apple juice concentrate, thawed
3/4 c canned pureed pumpkin
1/4 c plain yogurt
2 large eggs
1 tsp vanilla
1/4 c chopped walnuts (optional)
Preheat oven to 400 degrees F. Line a 12-cup muffin tin with paper liners, or use 12 silicone muffin cups (I have never used these, but I hear they are fantastic!)
In a small saucepan, combine raisins and rum. Bring just to a boil then remove from heat and cover until raisins are plump and liquid is almost absorbed.
Meanwhile, in a large mixing bowl, stir together flour, baking powder, baking soda, cinnamon, cardamom, cloves, and ginger.
In a second bowl or large jug, combine oil, apple juice, pumpkin, yogurt, eggs and vanilla.
Stir wet ingredients until dry until just barely combined, keeping in mind that less stirring makes for lighter muffins. Stir in drained raisins and walnut pieces, if using.
Divide batter evenly among muffin cups, and bake 16-18 minutes, until muffins are risen and golden and a tester inserted into the centre of one comes out clean.
Makes a dozen.
balance.
Posted: February 19, 2010 Filed under: baking, chocolate, cookies, cranberries, nuts 3 Comments
I’m all about attempting balance in my life these days. If that statement has the whiff of the broad-swath, take-no-prisoners, tomorrow-I-start-a-new-life New Year’s resolution about it, you’ve caught me out: January 1st, 2010, four and a half months after the birth of my second child, slightly nauseous from the lack of sleep and the things I was constantly putting in my mouth to compensate, I decided it might be time to take things in hand a little, or at least attempt it.
Order from chaos might be asking a bit much of my life these days, but a little balance? That seemed like a pretty reasonable goal for the new decade.
Six weeks in I’m nowhere close to achieving it, of course, but I’m taking refuge in the little things: I balance the fact that I am only drinking wine on the weekends with eating chocolate nearly every day. In deference to the fact that I’m breastfeeding, I’ve managed to resign myself to drinking decaf coffee and avoiding all things dairy – and that includes butter, yowch! – but I can handle that, because there is always goat cheese.
And if all else fails, I have engaged a running coach, ostensibly to help me shed some post-baby flab, but mostly because I feel that any amount of overindulgence can in theory be balanced out by lots and lots of cardio.
Recently, my friend Alysa came by on a Tuesday night, and we shared a bottle of wine after all of our kids went to bed. Alysa is the kind of person who really knows how to make things happen, whereas I tend to fantasize about things happening while flipping through cookbooks.
Alysa cooks food that her husband sometimes calls “too healthy to be tasty;” I cook food that causes my husband to murmur wonderingly that we’ve managed to exceed our daily recommended fat intake in a single serving.
About two thirds of the way through our bottle, we both confessed to a secret desire to start a blog.
Our divergent approaches notwithstanding, both of us love food and believe that there is no better place for friends and family to gather than in the kitchen, or around the table; and so, by the time we had finished our wine, Alysa and I had decided we’d start a blog together.
As in elsewhere in our lives, despite our differences, the hope is that some kind of balance will prevail – and if not, a little chaos in the kitchen never hurt anyone, did it?
Welcome!
Chocolate Cookies for Balance
My daughter and I made these together the other day to calm a craving – so yes, they’ve got chocolate in them, but also whole wheat flour (healthy!), brown sugar (unrefined!) and dried cranberries (antioxidant!) so fit the balance requirement nicely – or at least that what I’m telling myself…
1 stick (1/2 c) soft unsalted butter
1 c lightly packed brown sugar
2 tsp vanilla
1 egg
1 c + 2 tbsp whole wheat pastry flour
1/2 c cocoa powder
1/2 tsp baking powder
3/4 c chocolate chips
3/4 c dried cranberries
Preheat oven to 350 degrees F.
Line a couple of baking sheets with parchment.
Cream together butter and sugar (I use my Kitchenaid fitted with the paddle attachment) until fluffy. Beat in vanilla and egg.
Combine flour, cocoa, and baking powder in a separate bowl and stir into butter mixture in three additions until blended. Stir in chocolate chips and cranberries.
Drop batter by tablespoonsful onto prepared pans – I got a dozen cookies per pan.
Bake 12-14 minutes, until cookies are slightly dry around the edges. Cool 5 minutes or so on pan before transferring to a wire rack to cool completely.
Makes about 24 cookies, depending on the generosity of your spoonfuls.
